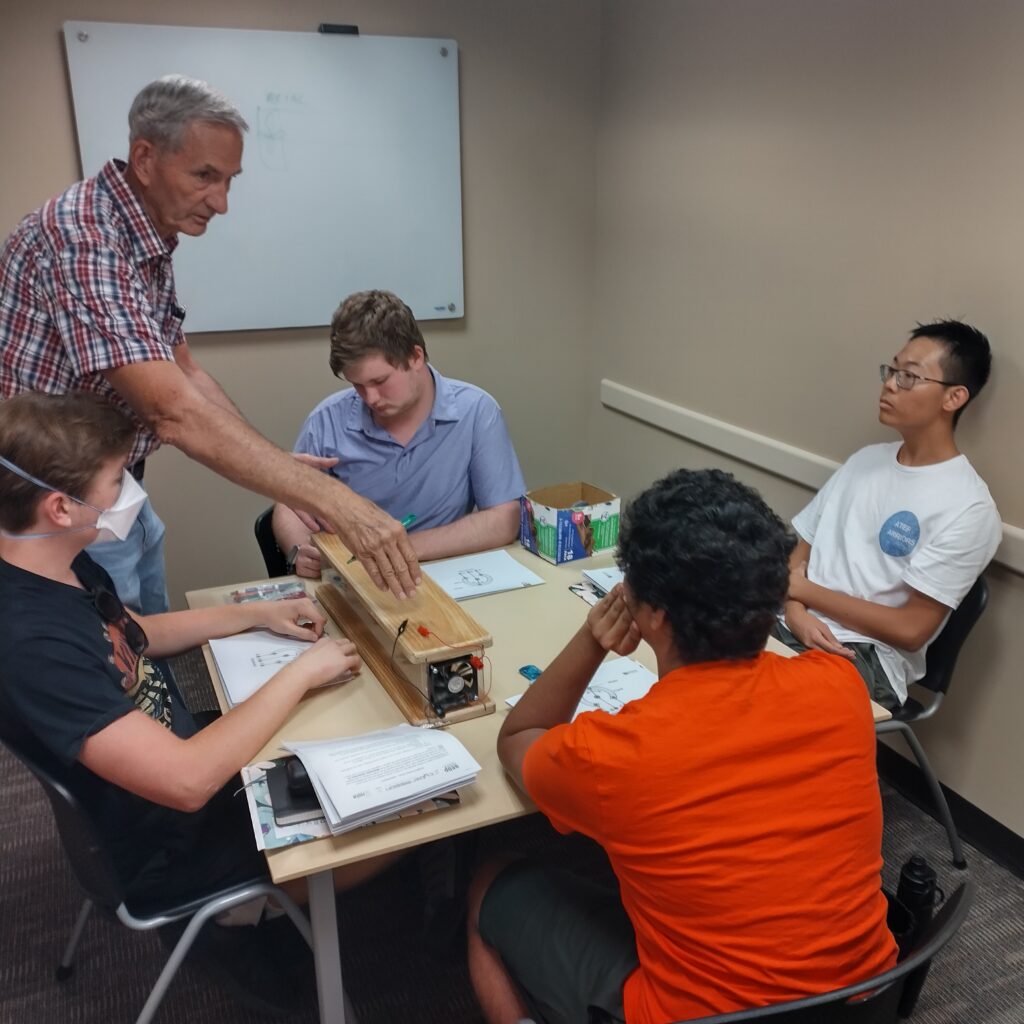
One of the problems with our original design was that the fans were moving air through the material too quickly. Consulting with an expert further revealed that this would not only be less effective but also cause condensation on the front of the material, resulting in decreased adsorption potential. Under the guidance and consultation of a professional engineer, we constructed a wind tunnel and invested in an anemometer, taking measurements of the airflow at various voltages and locations, in order to determine what level of resistance we needed on our fans and where to place our hygroscopic material.

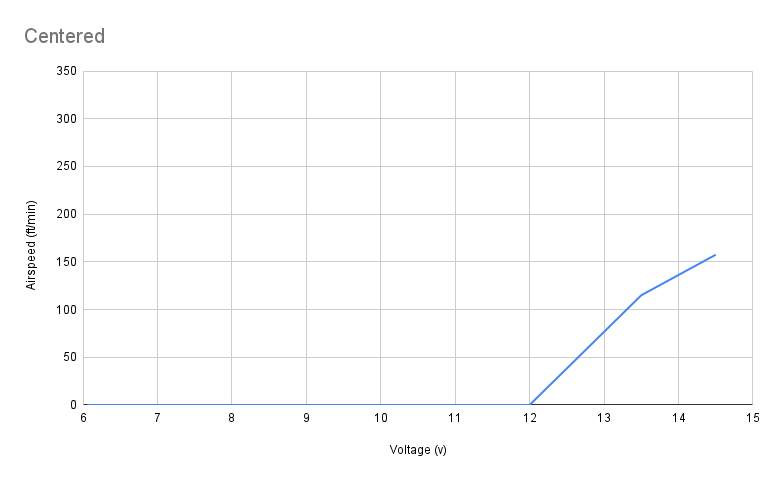
For our first test, we placed the anemometer between the fans in the center of the wind tunnel. We were getting low air speeds and learned there was a blind spot in the center of the wind tunnel between the fans, due to the shape of the fans. This gave us insight into where we needed to place our material.

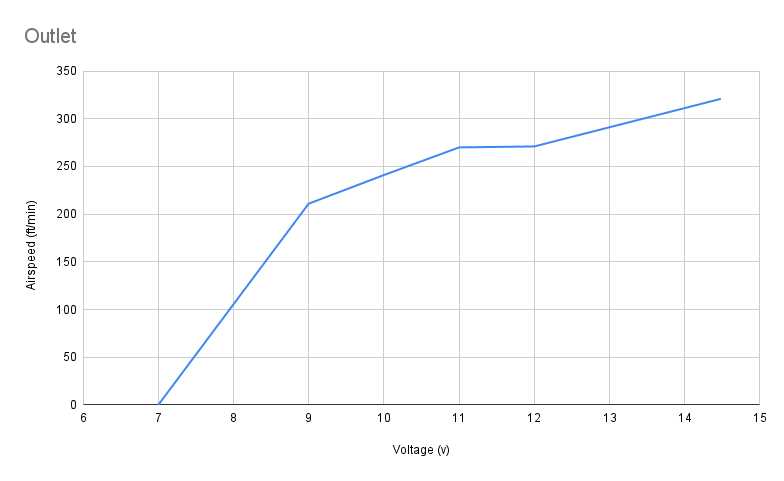
For our second test, we placed the anemometer outside the tunnel, behind the outlet fan. This test was conducted to calibrate the anemometer and verify that some of our readings and assumptions were correct. We measured much higher air speeds at this location.

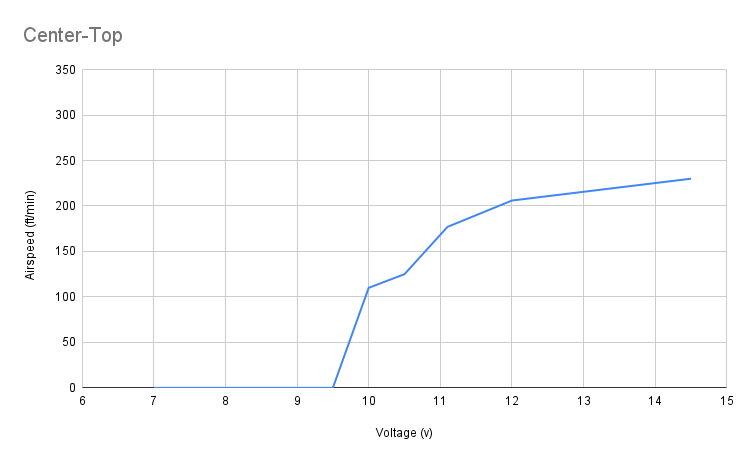
For our final test, we placed the anemometer in the center of the tunnel, raised slightly, so as to avoid the dead spot. This batch of tests was the most helpful as we were able to get good readings and find a place to place the hygroscopic material, the lower limits of the fans, and the range for our results.